Altium Library Management
IIT Motorsports keeps an extensive catalog of parts for our schematics and PCBs. To ensure accurate circuit design and board production, it is imperitive that the data for these parts is entered correctly. We use the standardizations and instructions as listed below in order to maintain our parts library.
We store all of our parts in our Altium 365 cloud instance. This reduces the dependency on manually shared libraries for our contributors. All libraries are automatically synchronized between Altium instances.
Our components are split up into the following categories:
Component Categories
- Audio
- Batteries
- Capacitors
- Connectors
- Crystals & Oscillators
- Data Converters
- Diodes
- Fuses
- Inductors
- Integrated Circuits
- Amplifiers
- Clock & Timing
- Drivers
- Interface
- Logic
- Memory
- Power Supply
- Processors
- Wireless
- LED
- Logics
- Mechanical
- Microcontrollers
- Miscellaneous
- Optoelectronics
- Radio & RF
- Relays
- Resistors
- Switches
- Test Points
- Transformers
- Transistors
Install Component Helpers
We get the majority of our components from the Manufacturer Part Search (formerly Altium Content Vault). We use alternate component libraries when the part is not in the altium vault.
We use the following methods to retrieve components for Altium:
- Manufacturer Part Search (Recommended)
- SnapEDA
- Ultra Librarian
In order to make downloading components from SnapEDA and Ultra Librarian easy, we recommend installing the import tool for these libraries.
Install SnapEDA
- Exit Altium Designer.
- Grab SnapEDA Altium Plugin from https://www.snapeda.com/plugins/.
- Unzip the file.
- Run the
.exeinstaller. - Once installed, run Altium Designer and open SnapEDA using the button at the top.

- Sign in to SnapEDA.
- Open settings and change the library path to a known folder. You'll need to navigate to this folder each time you import a part from SnapEDA. We recommend:
{your_user}/Documents/SnapEDAImport.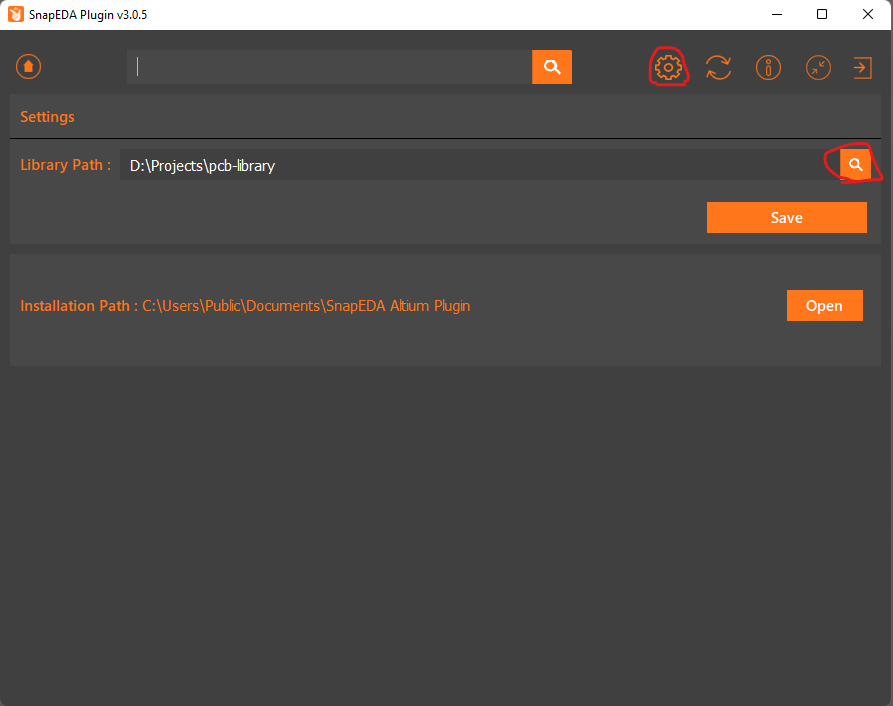
How to Find, Upload, and Use components
In order to find components, we use the following method:

Step 1 - Check Components Panel
The components panel represents all components that we've used and uploaded to our Altium 365 instance. This should be the first place you check for components. Any component that is created must be added to the components bin in order to be properly synced and used for all projects.
- Make sure that the IIT Motorsports Altium 365 instance is active by clicking the cloud icon in the upper-right hand corner.
- Ensure that the box above the search bar is set to
Allwhich will automatically pull components from the Altium 365 instance.
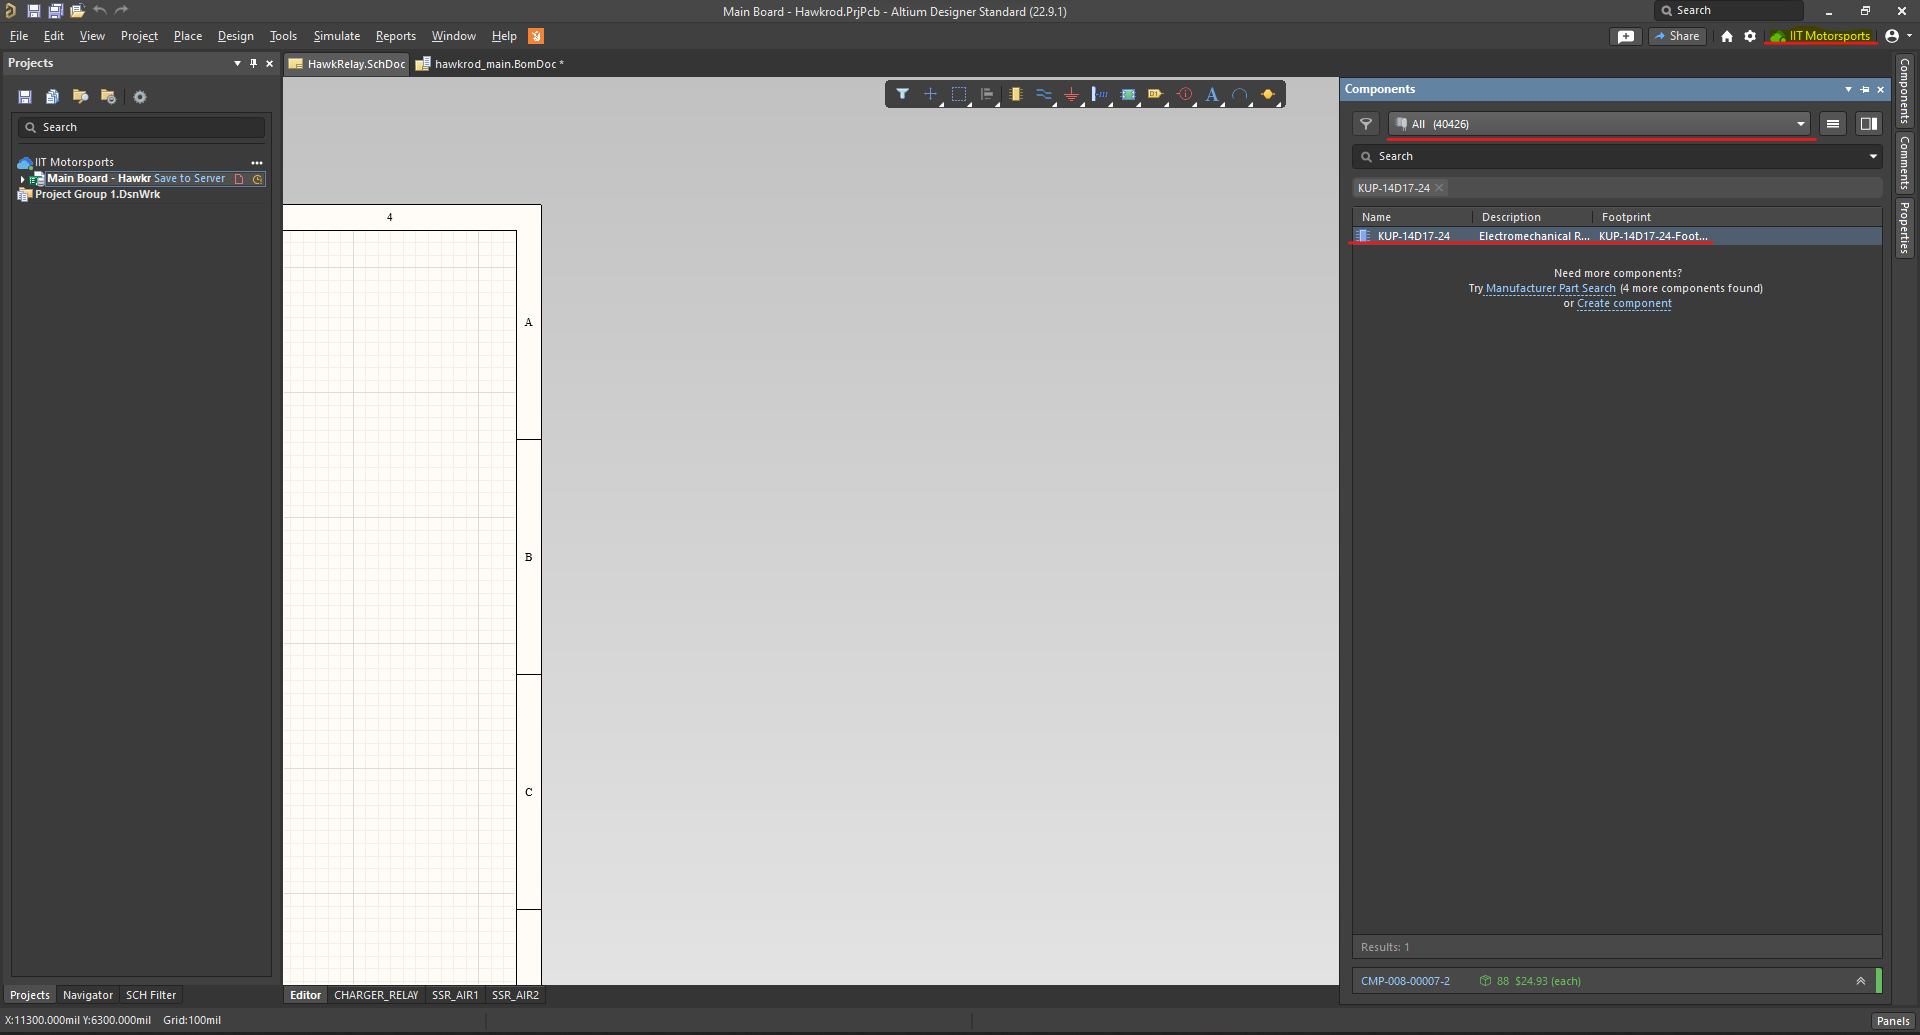
✅ If the part is found, then it can be dragged into the active project and you're done.
❌ If the part is not found, then move onto Step 2 - Check Manufacturer Part Search
Step 2 - Check Manufacturer Part Search
The manufacturer part search is an integrated component library solution that allows you to easily import popular components into Altium.
Here's the following steps to import a component. We will be using a Rohm Semiconductor RED SMD LED for this example.
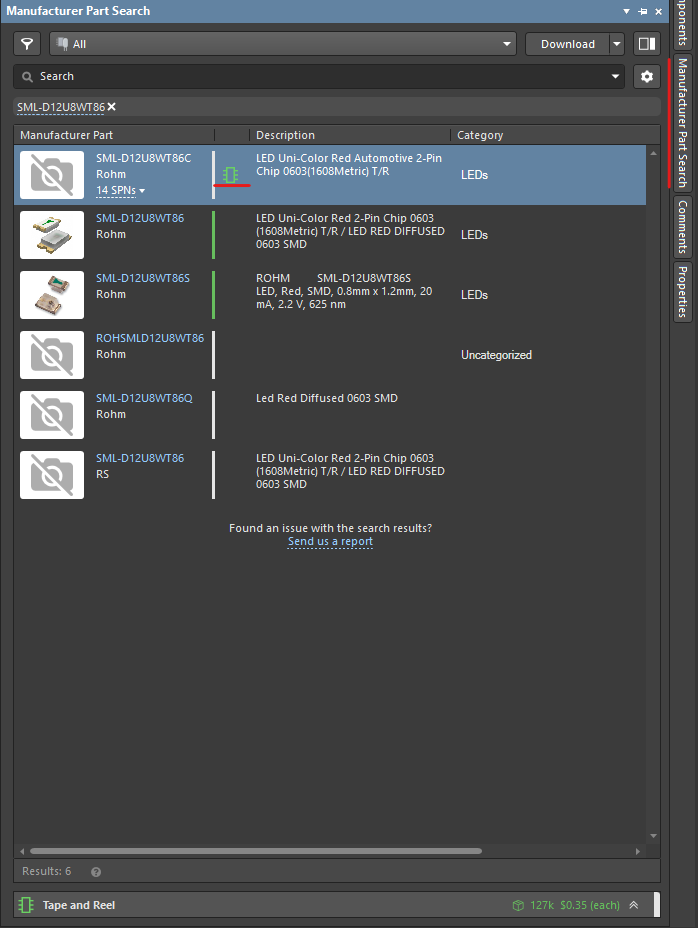
- Open the
Manufacturer Part Searchpanel and search for the desired component. The green semiconductor symbol next to the component indicates whether it has a symbol and footprint available which is required to make the component.
Warning
If the component does not have the green semiconductor symbol, then the part does not have the data necessary to make the component. Move onto Step 3 - Check SnapEDA.
-
Click the arrow next to download, then select
Acquire....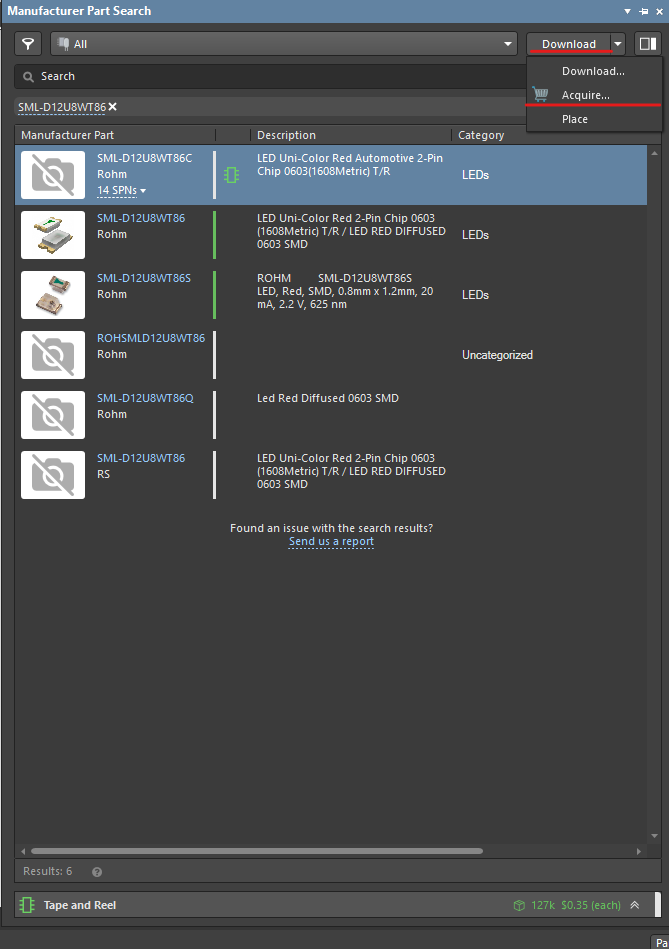
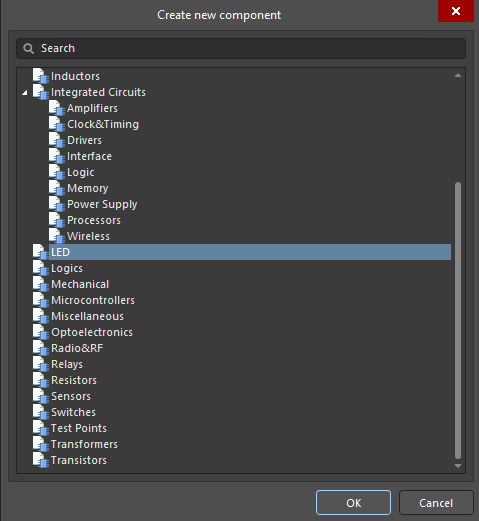
-
Select the type of the component. For this example, we'll be adding the component to the LED category.
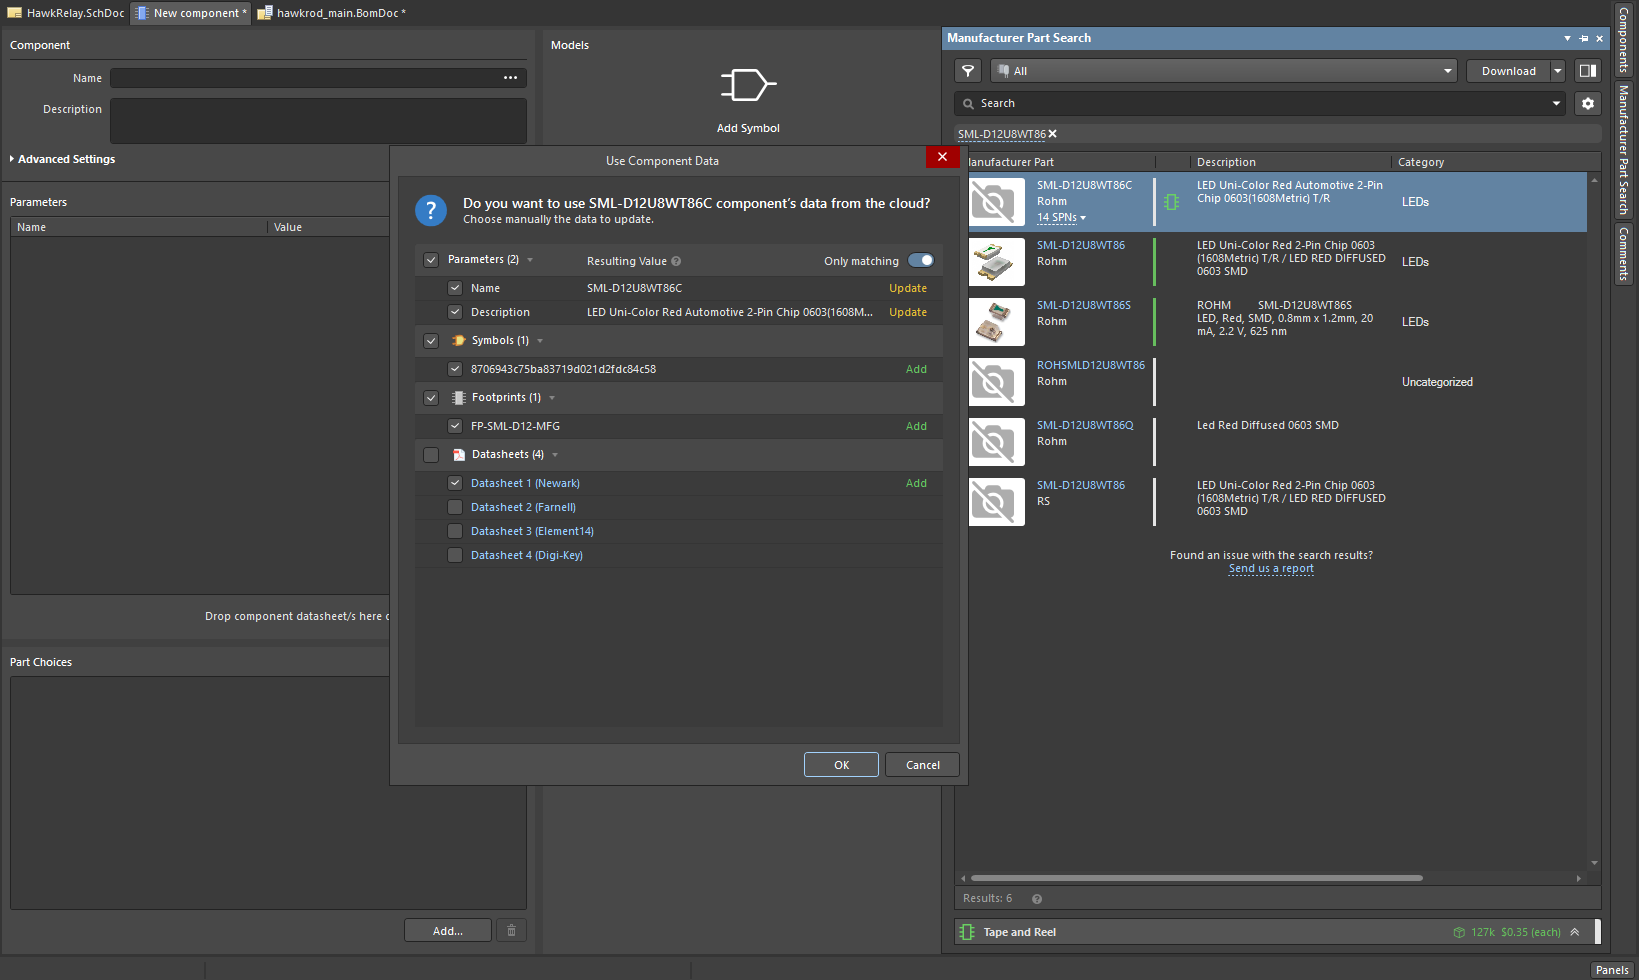
-
The menu will prompt you to accept the component data. We recommend that you only select one datasheet from the list to avoid uploading more data than necessary. Click Okay.
-
The Manufacturer Part Search will automatically fill out all of the necessary information. Unless any further changes are necessary, the component is ready to be uploaded. Right-Click the upper tab and click save, or use Ctrl+S. This will only save the component locally, and not to the cloud.

-
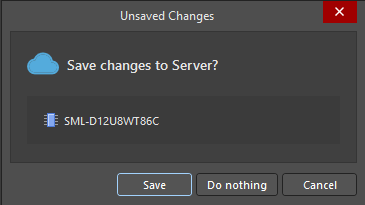
The component is ready to be uploaded to the cloud. Right-click the component tab and click
Close. When prompted, save the component to the server. When asked for release notes, click Okay.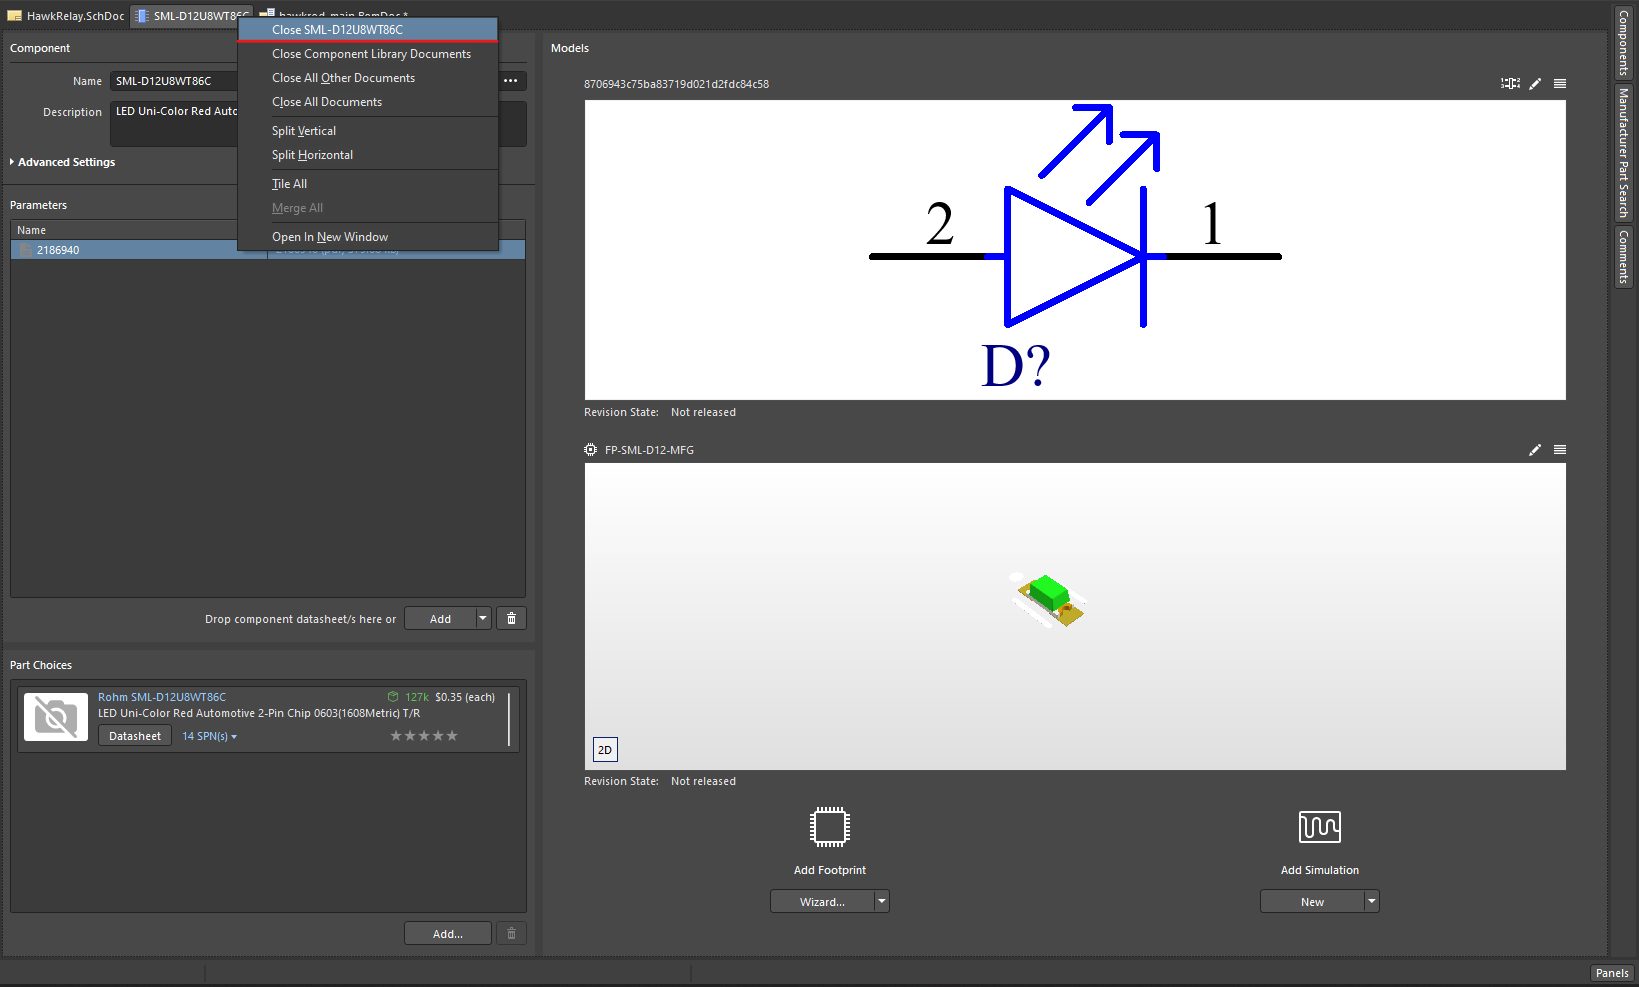
✅ The part has been successfully added and saved to the cloud. The component can be added from the components bin into the active project and you're done!
Step 3 - Check SnapEDA
SnapEDA is a popular third-party component library. SnapEDA has an extensive catalog of parts for companies like TE Connectivity and Amphenol. If the Check Manufacturer Part Search doesn't have the component, we check SnapEDA for the part next.
Note
Make sure you have the directory you set for SnapEDA in the Install Component Helpers step ready as it'll be necessary here.
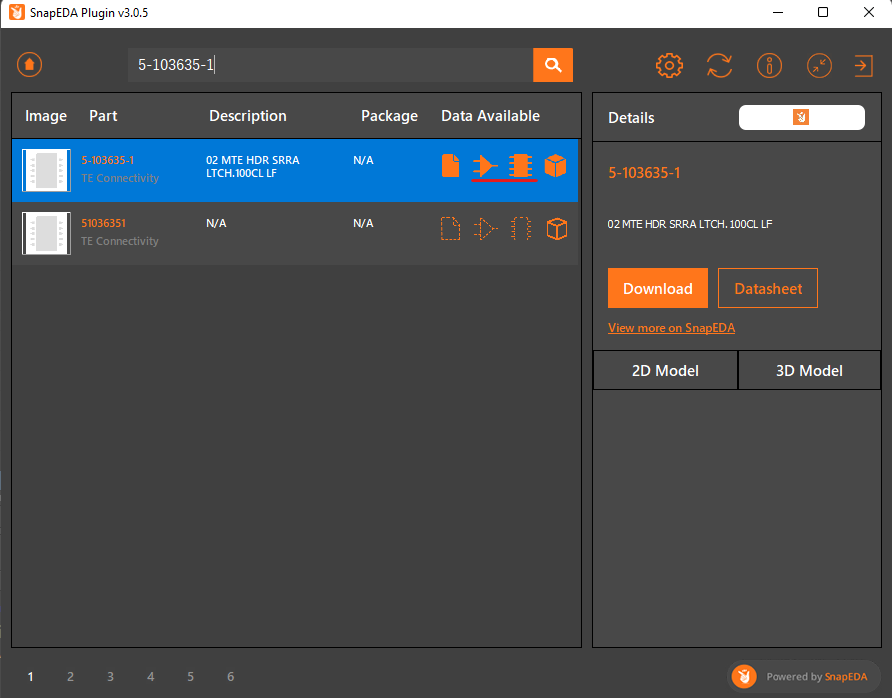
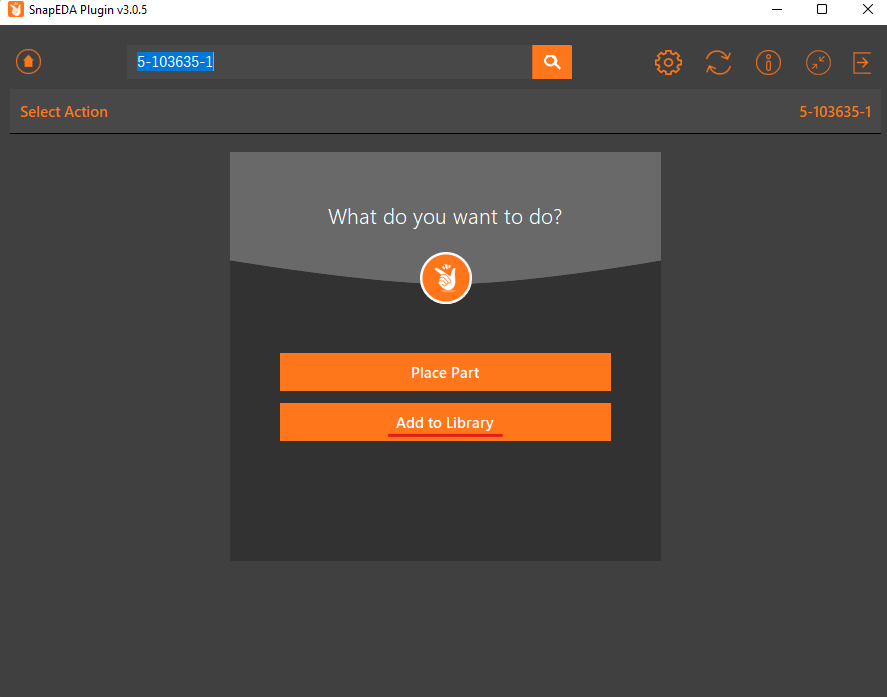
Here's the following steps to import a component using SnapEDA. We will be using a TE Connectivity 2 Position Header (5-103635-1) for this example.
Warning
If the component does not have the semiconductor and footprint symbol both illuminated, then the part does not have the data necessary to make the component. Move onto Step 4 - Check Ultra Librarian.
-
Open the
SnapEDApanel and search for the desired component.
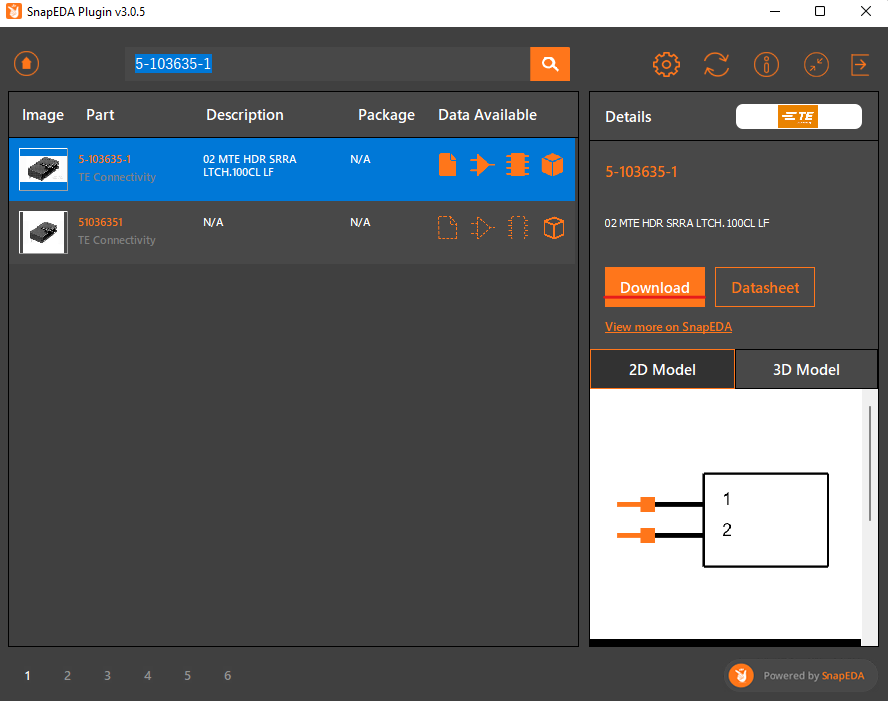
-
Download the component to your local computer. It is imperitive that you download the part instead of placing it. If the part is placed directly, then it won't be uploaded to the Altium 365 cloud.
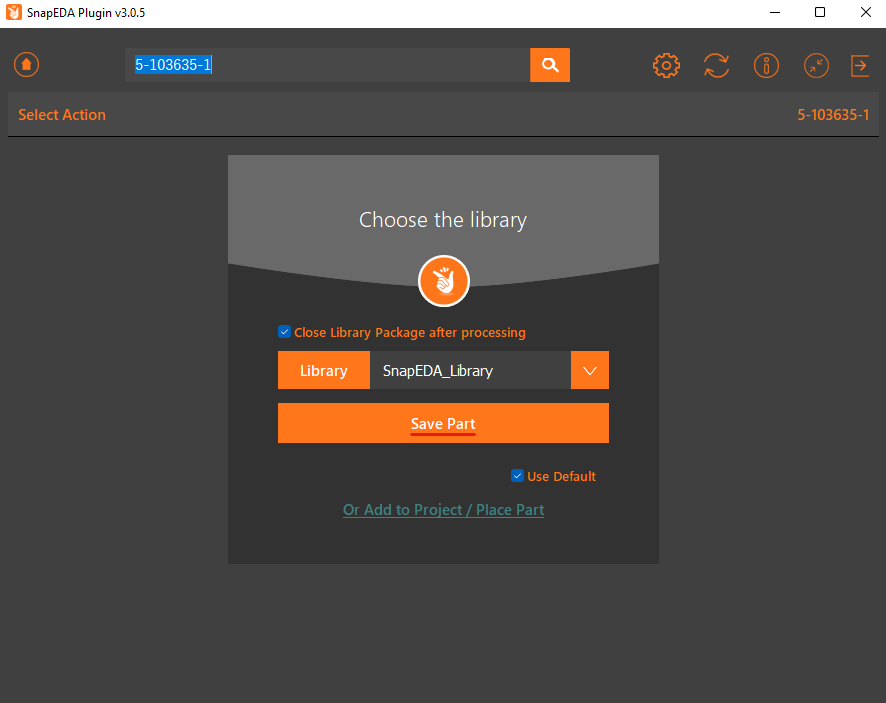
-
Navigate to the folder that you set for SnapEDA. There should be two files there with the same part number as the component.

-
Remember where these files are stored, and move on to Step 5 - Upload Component to Altium 365.
Step 4 - Check Ultra Librarian
Ultra Librarian is another online component library that can export files for Altium. We often find quality issues with the files provided by Ultra Librarian. At this stage, we recommend considering making the component from scratch.
Here's the following steps to import a component using Ultra Librarian. We will be using an Analog Devices Flyback Regulator (MAX17690ATE+T) for this example.
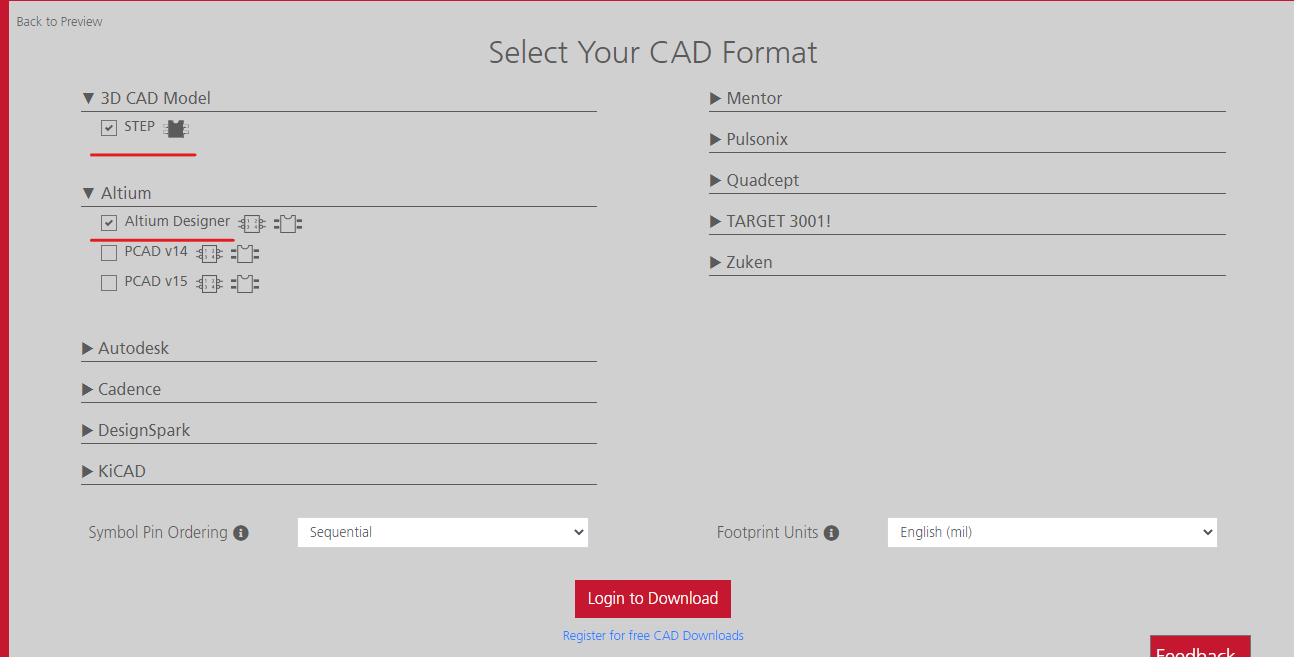
- Go to app.ultralibrarian.com and search for your component. Once at the component page, click the
Download Nowbutton. Select the 3D step and Altium Designer files.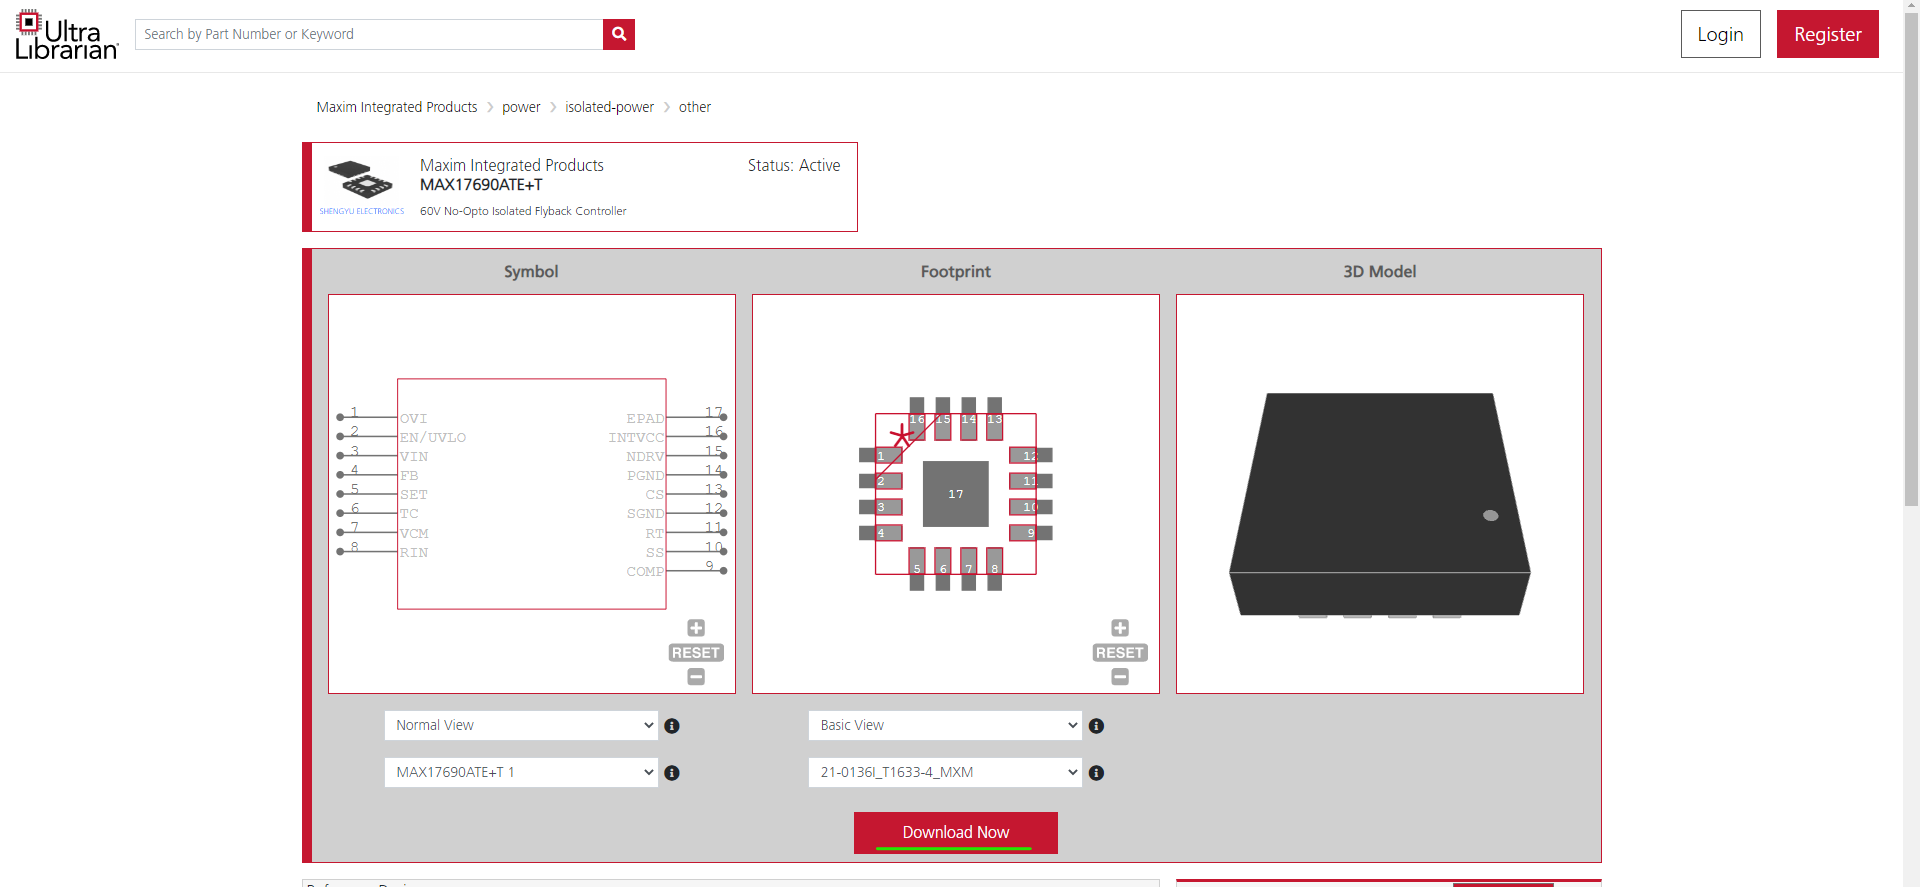
- Once downloaded, extract the files to a temporary folder.
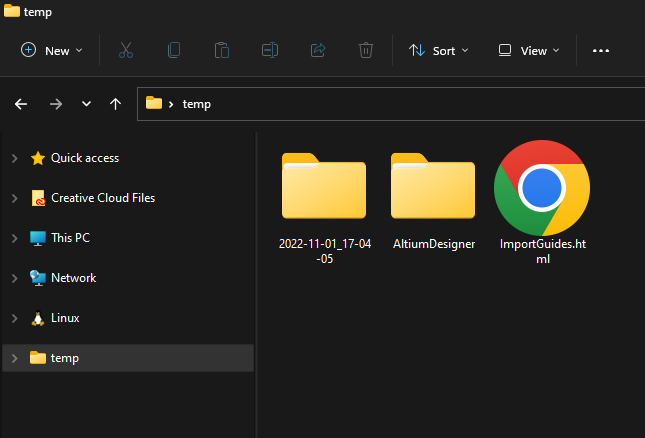
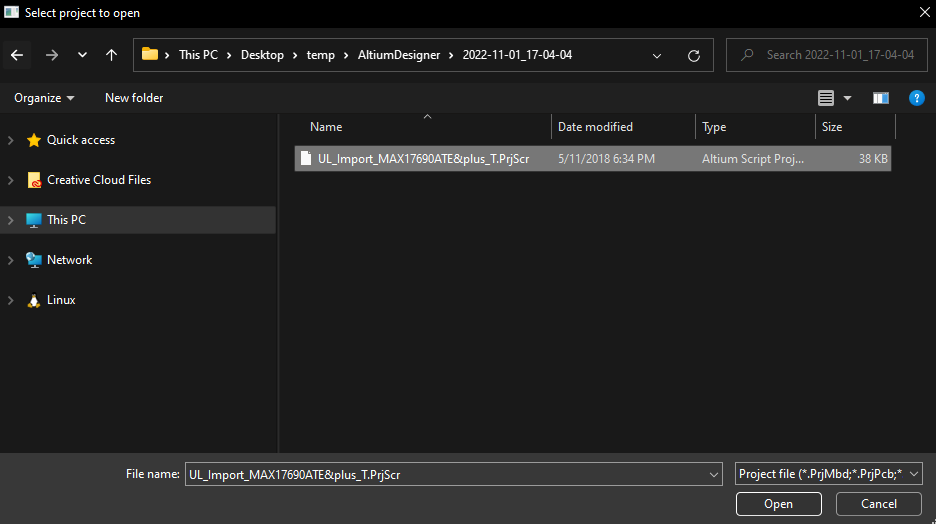
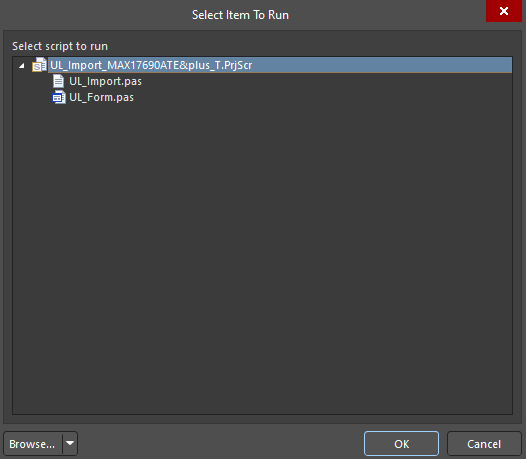
- Open Altium Designer, and click
Edit -> Run Script. Once open, click browse, select file and navigate to[Temp folder]/Altium Designer/[date]/*.PrjScr. Open it and then click run.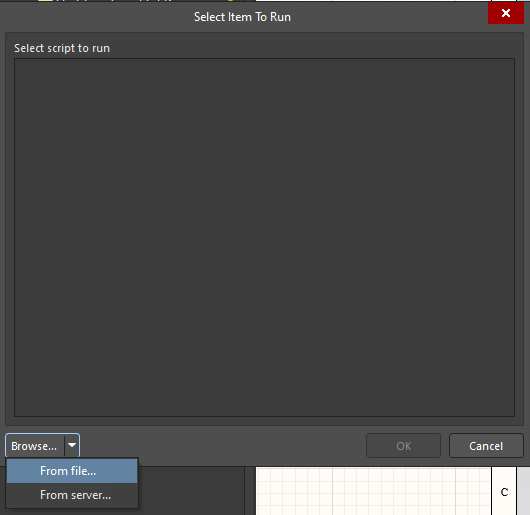
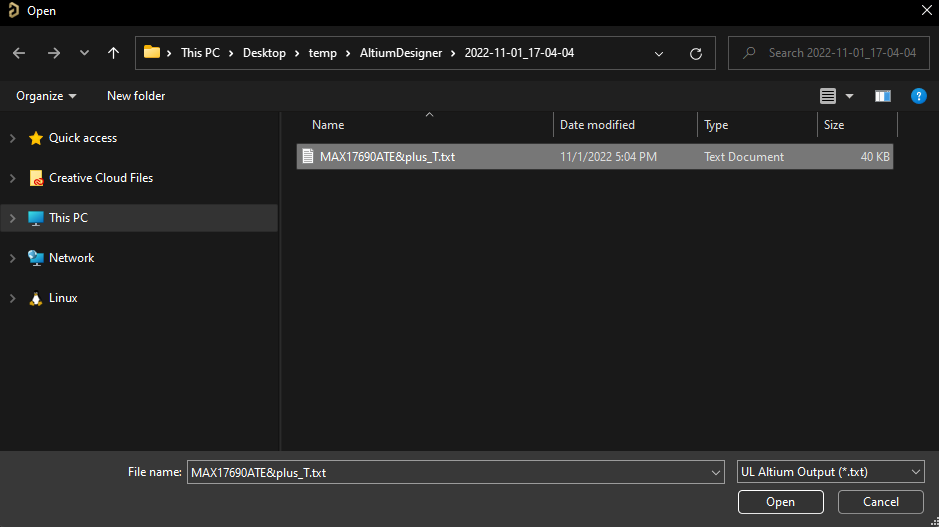
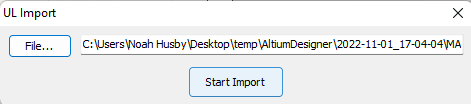
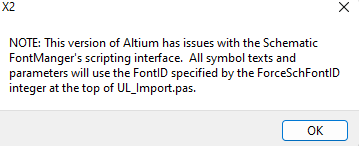
-
At the window, select the
File...button, and navigate to[Temp folder]/Altium Designer/[date]/*.txt. Click okay, then clickStart Import. At the prompt, click Okay to silence the warning.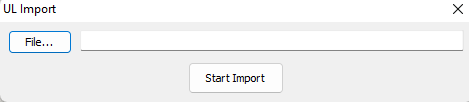
-
Navigate to
[Temp folder]/Altium Designer/[date]. The*.PcbLiband*.SchLibfiles should be visible. These will be necessary for the next step.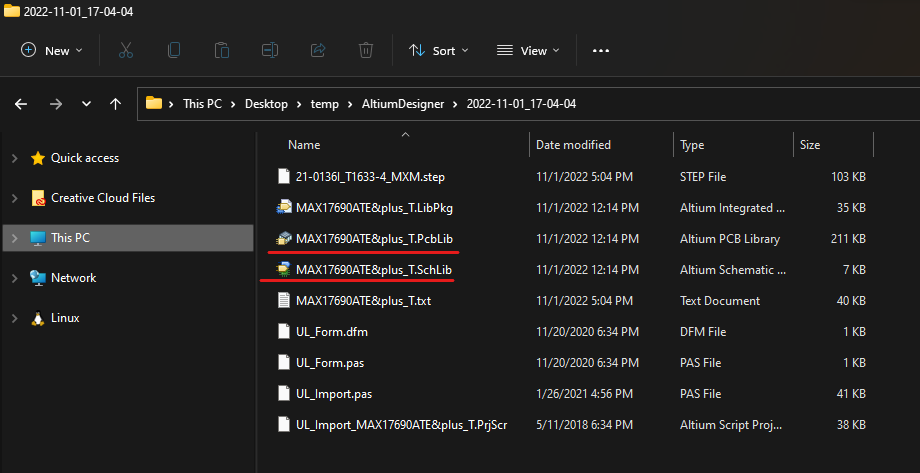
-
Remember where these files are stored, and move on to Step 5 - Upload Component to Altium 365.
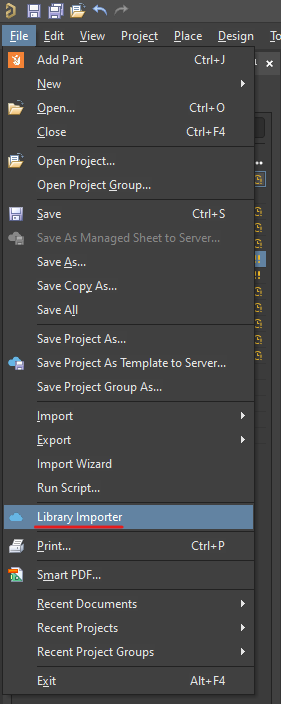
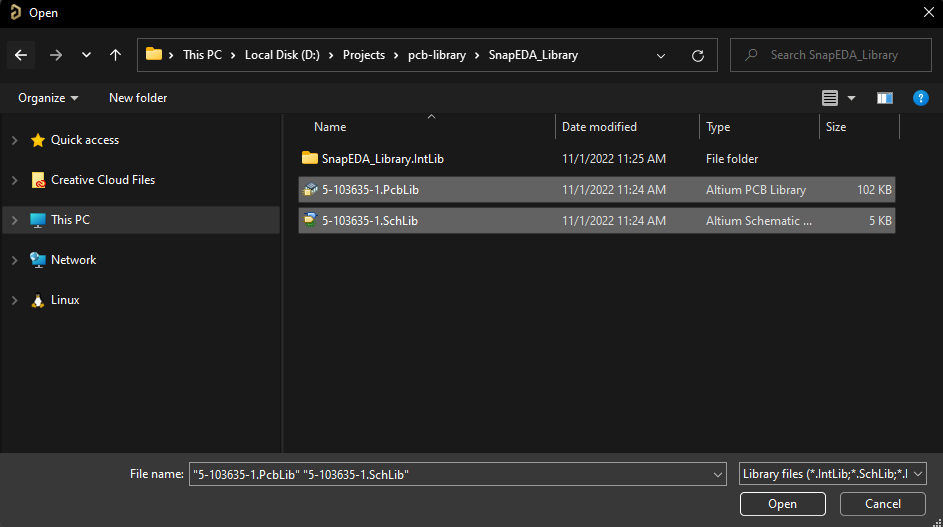
Step 5 - Upload Component to Altium 365
-
Open Library Importer, navigate to the folder with the component files, and select the two files with the corresponding part name.

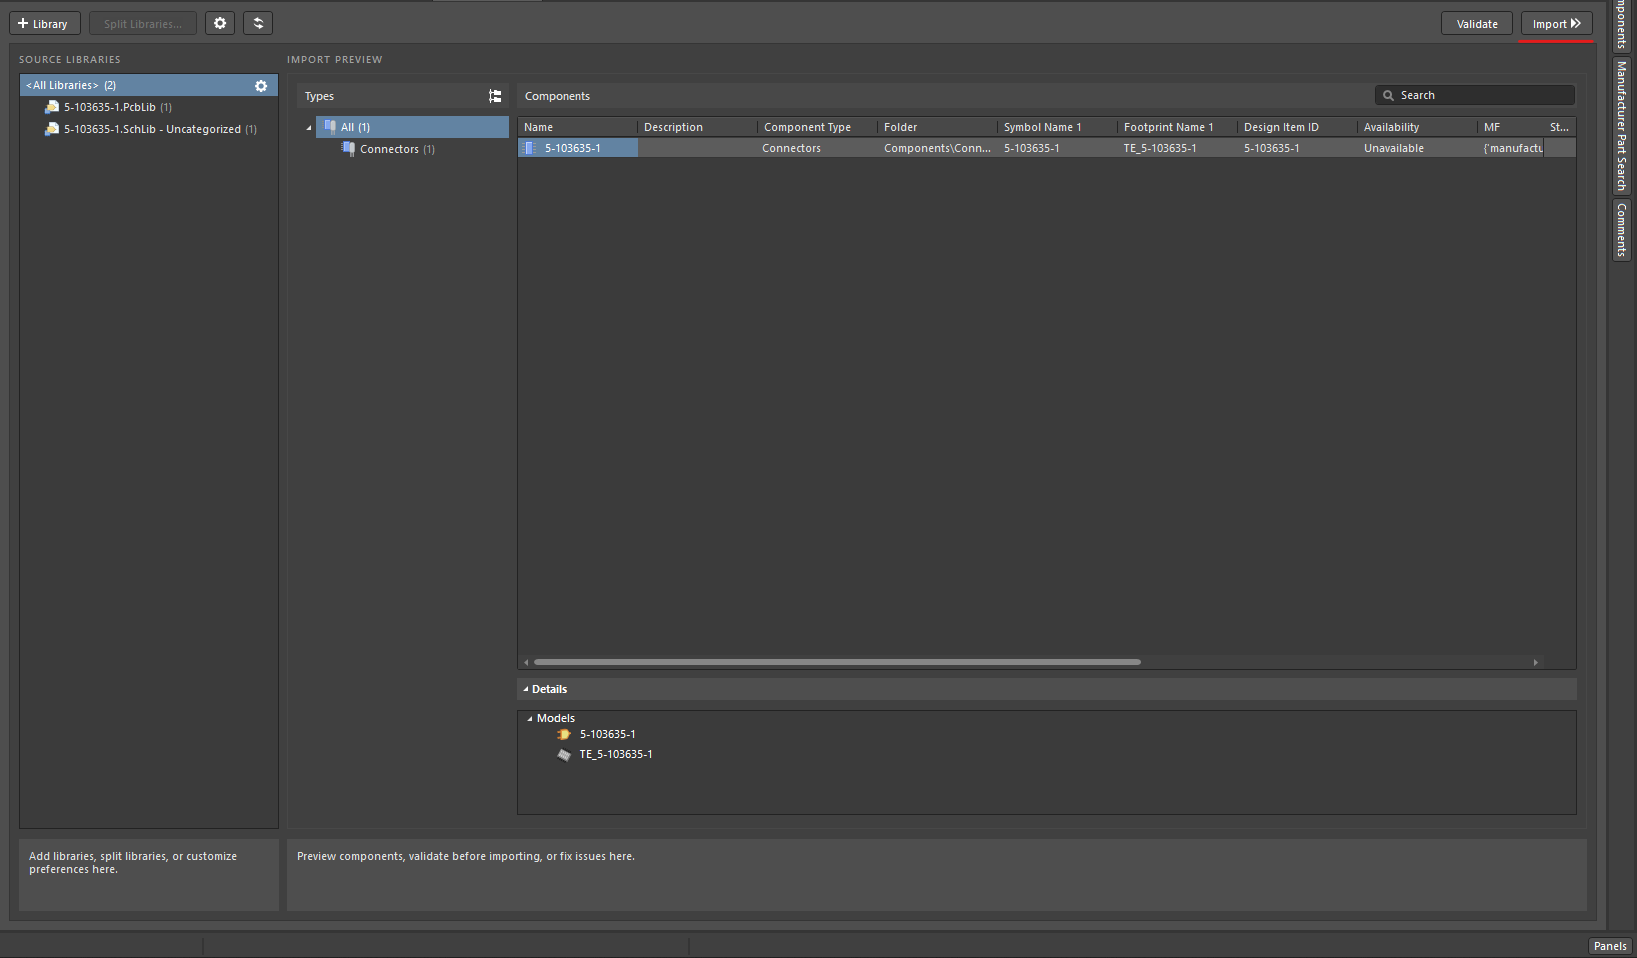
-
Set the type of the component, then click
Import.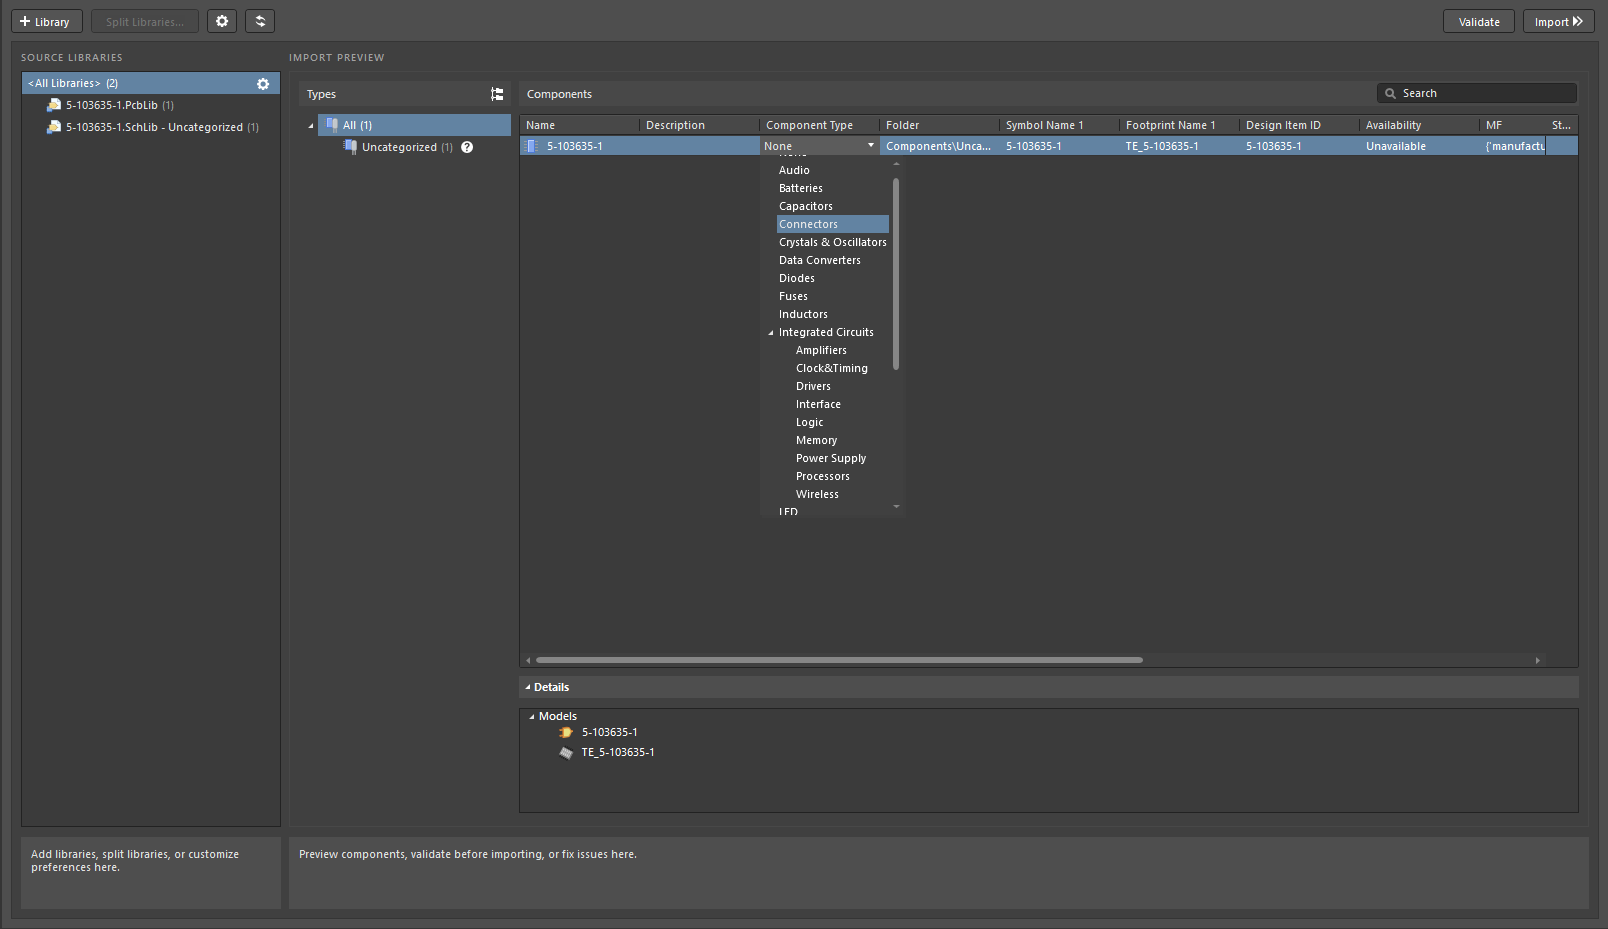
Abstract
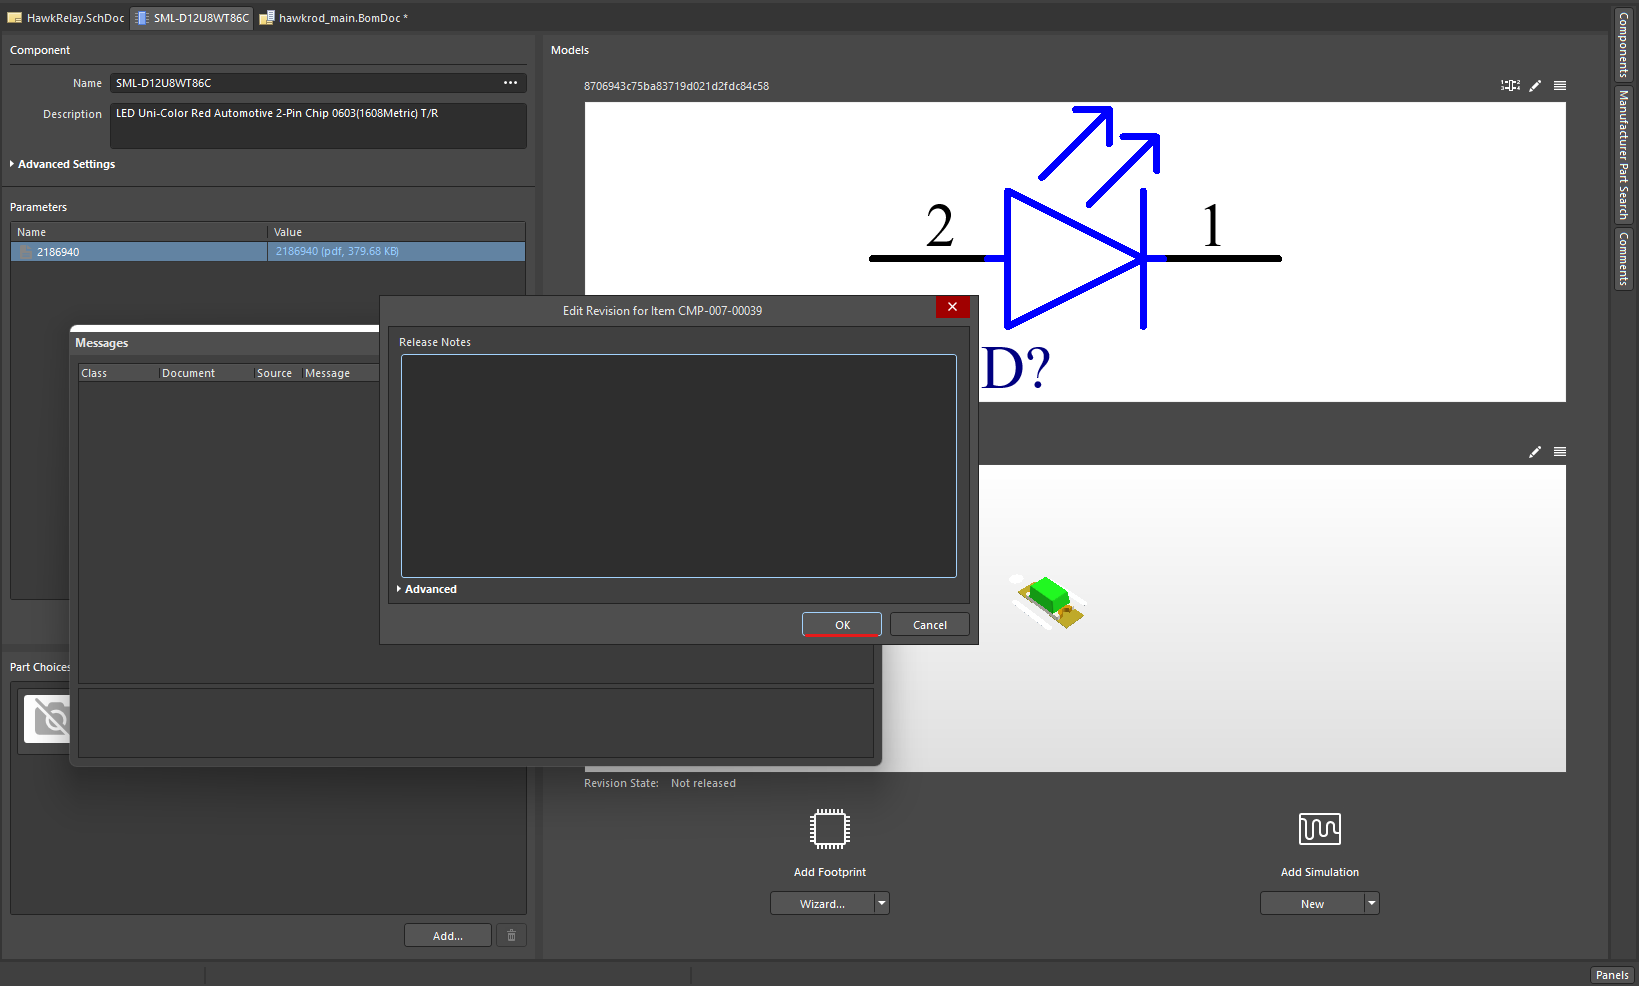
Imported files are often missing necessary data and models. The component imported using the method above must be re-edited in order to add the missing data.
Follow these steps to add conclusive component data:
- Go to the
Componentspanel and search for the component you just uploaded. Right click on the component and click Edit.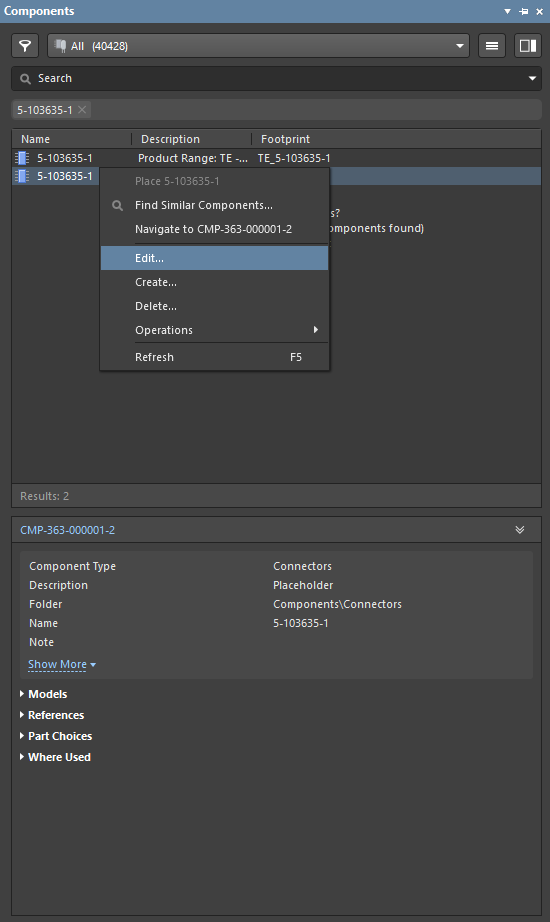
-
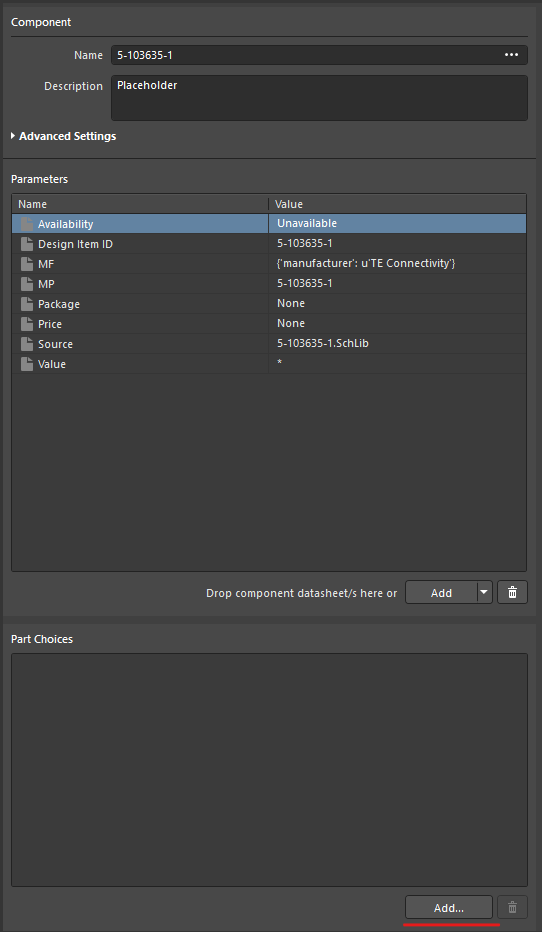
Check the Part Choices box. If this is empty:
-
Click the add button.
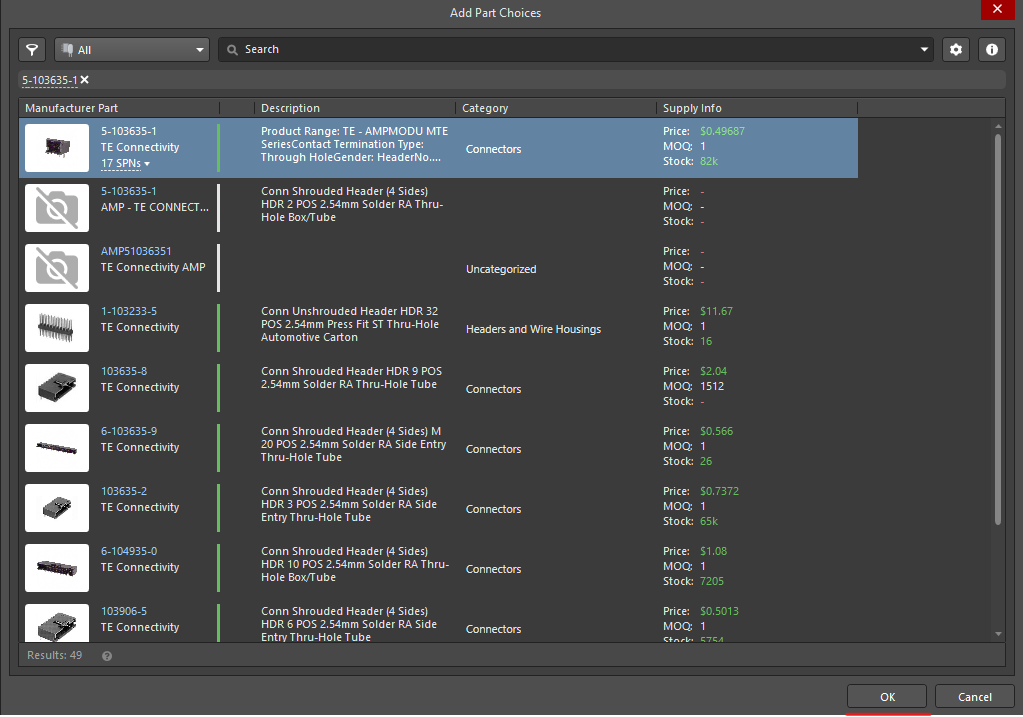
-
Find the correct part data from the list. Altium should automatically search for the part number, but manual searching may be necessary in certain cases.
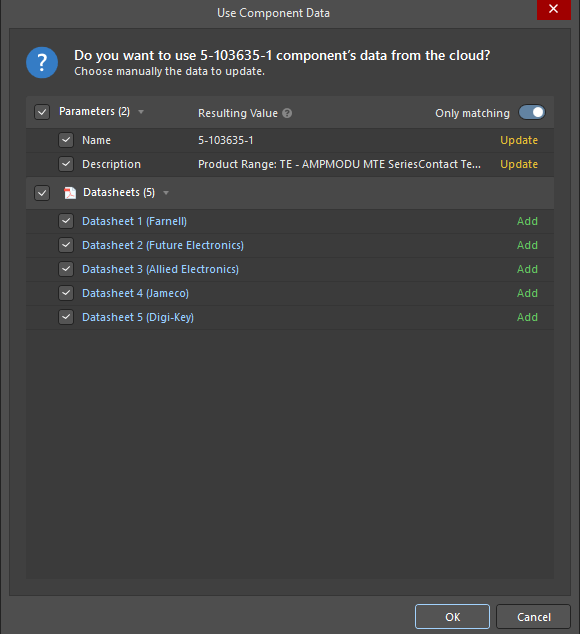
-
Select all checkboxes under parameters. We recommend you only select one datasheet since they are most likely duplicates of each other. Then click Okay.
-
-
It is crucial that the part has a 3D model if possible. This is necessary for determing clearence with circuit boards as well as accurate renders. Altium can accept .stp, .step files as 3D models for components. If there is no 3D model and you don't have a 3D model website, try to find the model file from the component manufacturer's website. Follow this guide on placing a 3D model on an altium footprint for reference.
- The component is ready to be uploaded to the cloud. Right-click the component tab and click
Close.When prompted, save the component to the server. When asked for release notes, click Okay.